Posts

Showing posts from 2015

iPhone-iOS and Android push notification script - PHP code

Here I am presenting before you  - how to perform the push notification process with PHP code which I have recently gone through. Based on url GET parameter ( "type" ), the script will automatically execute the respective iOS or Android push notification process. //*** Android Push Notification if( isset($_GET['type']) && ($_GET['type'] == 'android')){ //*** Your API access key from Google Cloud Messaging( GCM ) define( 'API_ACCESS_KEY', 'YOUR GCM KEY' ); $registrationIds = array("YOUR DEVICE IDs" ); //*** Configure the bundle $msg = array (     'message'       => 'Your message for push.',     'title'         => 'Your title',     'subtitle'      => 'Your subtitle',     'tickerText'    => 'Your ticker text here',     'vibrate'   => 1,     'sound'     => 1 ); $fields = array (     'registra
Virtual host - ubuntu(linux)

Create(set) virtual host as local domain- ubuntu(linux) Sometimes we need to create a local domain for the sites in our local server. To accomplish this purpose, we need to create a virtual host entry in apache hosts and respectively create its dependencies as well. Example : localhost/myproject => myproject.localhost To meet the above described requirements, we need to follow below steps over your terminal(command-line) considering you are at /(root) directory: 1- Create your site's conf file under the directory : etc/apache2/sites-enabled. Enter command : - sudo cp /etc/apache2/sites-enabled/default.conf /etc/apache2/sites-available/myproject.localhost.conf - sudo nano /etc/apache2/sites-enabled/myproject.localhost.conf Make the changes as defined below: <VirtualHost *:80>         ServerAdmin webmaster@localhost         ServerName myproject.localhost         DocumentRoot /var/www/myproject         <Directory /var/www/myproject>            

Gravity form tweaks and techniques

Gravity form tweaks Gravity form -  Multiple form instances on same page Sometime you need to call gravity form multiple times on the same page but this needs some amendments to the normal flow of gravity form. Here I am going to demonstrate  how you will meet this requirement. I have used one wp plugin "Gravity Forms: Multiple Form Instances" and done some modifications to facilitate the following requirement : 1- Need to make it work for a single form and leave rest as it is as most of the validation is based on the form ids. 2- In multiple form instance plugin random ids are generated to differentiate same form access as multiple instance. I have made it little simple by using sequential ids rather than random number. Like : Form id - 15 will be accessed over one page as 151, 152,153 and so on. Follow the below steps: 1- Perform below amendment in the function "gform_get_form_filter" definition in plugin file as under. public static $cnt = 0; self

Magento - Customize 503 maintenance default error page

I am gonna tell you all the way to change Magento default 503 page view so that you can set your site on maintenance without thinking , your site is looking shit now. Just follow the below simple steps and its too easy : 1- Magento root has errors folder and inside the same you can see folder default . 2- When you open processor.php you see const DEFAULT_SKIN = 'default'. 3- Now change this const value from default to customskin ( i am assuming this as new skin name). 4- Copy all files from default folder to newly create folder customskin( under errors folder ) 5- Now change inside new skin phtml pages as per your need. 6- You may also edit local.xml as per your need. Stay Cool !! Thanks for your valuable comments and suggestions.

Magento - Add seo content to Home page end

Look, there are many ways to set any SEO content to home page of your magento website but I am gonna tell you xml layout reference based technique. Just follow the simple steps as mentioned below: 1- Create a statis block with any name (i am considering name as 'seo_content') and put your content in that block. 2- Open your theme layout cms xml and search for cms_index_index 3- Inside the same tag you need to define mentioned reference call like below :    <cms_index_index translate="label">         <label>CMS Home Page</label>         <reference name="before_body_end">             <block type="cms/block" name="seo_content" before="insert_after_this_block">                 <action method="setBlockId"><block_id>seo_content</block_id></action>             </block>         </reference>     </cms_index_index> This is the way if y

MWS (Amazon Marketplace Web Service) API Integration

Image
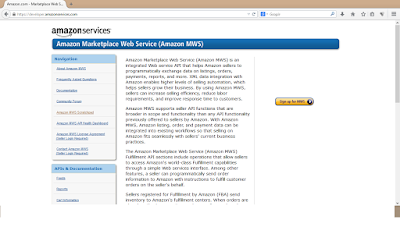
MWS (Amazon Marketplace Web Service) MWS is a web service API from amazon that provide facility to automate the data interchange between seller and amazon regarding inventory management, listing, order, reports, shipping, payments and more.   Automate the Feed upload( Product Upload) One need to follow the steps to automate the feed/product upload to amazon seller account that will be visible to amazon marketplace for sale: 1      Login to seller account via link : http://sellercentral.amazon.com/   ( US based seller ) 2      Go to Inventory->Add product via upload page and identify your file type to upload. Example: ‘Inventory Loader  File’ for uploading new feeds for all categories 3      Now you need a file template to upload as inventory updater. Important thing is now to decide which way you want to upload your feed upload process either via flat file or XML request . I choose flat file as it is easy to manage and faster in processing for large a